Why You’ll Love This Root Beer Float Cupcakes Recipe
If you’ve ever enjoyed a classic root beer float, you’re going to love these cupcakes. They capture that nostalgic flavor in a delightful, moist treat.
Imagine biting into a light, fluffy cupcake that reminds you of summer days spent sipping root beer floats. The combination of root beer extract and a touch of vanilla makes each bite a sweet, fizzy experience.
Plus, the frosting brings that creamy texture we all adore. These cupcakes are perfect for parties, birthdays, or just a fun afternoon treat.
Trust me, once you try them, you’ll be hooked on this delicious twist!
Ingredients of Root Beer Float Cupcakes
When it comes to making Root Beer Float Cupcakes, having the right ingredients is key to capturing that nostalgic flavor we all love. These ingredients come together to create a moist and fluffy cupcake that not only tastes delightful but also evokes memories of enjoying a classic root beer float on a hot summer day.
So, let’s gather everything we need before diving into the fun part—baking.
Here’s what you’ll need for these delicious cupcakes:
- 3/4 cup butter (softened)
- 3 eggs (at room temperature)
- 2 1/2 cups all-purpose flour
- 2 1/2 teaspoons baking powder
- 1/2 teaspoon salt
- 1 1/2 cups sugar
- 1 tablespoon root beer extract
- 1/2 teaspoon vanilla extract
- 1 1/4 cups root beer (the fizzy stuff)
- 1/4 cup butter (for frosting, softened)
- 3/4 cup vanilla ice cream (softened slightly)
- 1/2 teaspoon vanilla extract (for frosting)
- 4 cups powdered sugar
- 24 root beer-flavor hard candies (for decoration)
Now, let’s talk about some fun considerations while gathering these ingredients. Make sure your butter and eggs are at room temperature; this helps create that fluffy texture we all crave.
If you’re feeling adventurous, you can even experiment with different brands of root beer extract to find your favorite flavor. And hey, speaking of ice cream, if you’ve got a favorite flavor other than vanilla, like chocolate or even strawberry, feel free to get creative with that frosting.
Just remember, the goal is to keep that root beer float flavor front and center. But for now, let’s get ready to bake these tasty treats!
How to Make Root Beer Float Cupcakes
Making Root Beer Float Cupcakes is like taking a delightful trip down memory lane, and it all starts with some simple steps. First, let’s prep our ingredients. You’ll want to make sure your 3/4 cup of softened butter and 3 eggs are at room temperature—trust me, this is key for that light and fluffy texture we all crave.
While you’re waiting, line twenty-four 2-1/2-inch muffin cups with paper liners. This is the part where you can get a little creative with colors or patterns if you’re feeling festive; after all, who doesn’t love a cupcake that looks as good as it tastes?
Now, let’s get mixing. In a medium bowl, whisk together 2 1/2 cups of all-purpose flour, 2 1/2 teaspoons of baking powder, and 1/2 teaspoon of salt. Set that aside for a moment.
In a large mixing bowl, beat your softened butter with an electric mixer on medium speed for about 30 seconds—just enough to get it all creamy and dreamy. Then, gradually add in 1 1/2 cups of sugar, about 1/4 cup at a time, and keep mixing until everything is combined. Scraping down the sides is critical here; we don’t want any sugar hiding out. After about 2 minutes, it should be light and fluffy.
Next, add in those eggs one at a time, beating well after each addition. Now comes the fun part: add in 1 tablespoon of root beer extract and 1/2 teaspoon of vanilla. The aroma? Pure magic.
Once that’s done, it’s time to incorporate the dry stuff and the fizz. Alternately add your flour mixture and 1 1/4 cups of root beer into the butter mixture, mixing on low speed just until combined. This is the moment where you can practically taste the nostalgia.
Spoon that batter into your lined muffin cups, filling them about two-thirds to three-fourths full—no one likes a cupcake that overflows. Bake in a preheated oven at 350 degrees F for 15 to 17 minutes. The toothpick test is your best friend here; you want it to come out clean. Let them cool in the muffin cups for 10 minutes before transferring them to wire racks to cool completely.
While the cupcakes are cooling, it’s time to whip up the Float Frosting. Grab that 1/4 cup of softened butter and beat it until fluffy, then mix in 3/4 cup of slightly softened vanilla ice cream and 1/2 teaspoon of vanilla.
Gradually add in 4 cups of powdered sugar, and if it’s looking too thick, add a tablespoon of the remaining ice cream until you reach that perfect piping consistency.
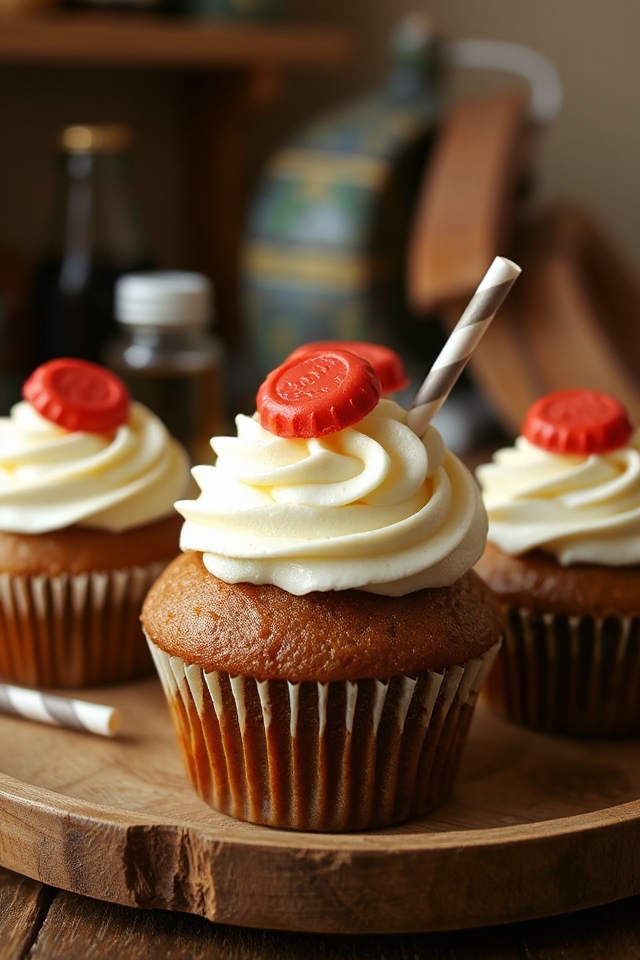
Now, once your cupcakes are cool, go ahead and pipe or spread that frosting over the tops. And for that classic root beer float touch, don’t forget to top each cupcake with a root beer-flavor hard candy and maybe a little straw half.
Voila! You’ve got yourself a batch of Root Beer Float Cupcakes that are sure to impress at any gathering, or even just for a cozy night in with a little indulgence. Enjoy!
Root Beer Float Cupcakes Substitutions & Variations
Now that the cupcakes are ready and cooling, let’s explore some tasty substitutions and variations to make this recipe your own.
If you want to switch up the flavors, use cream soda instead of root beer for a different twist. You can also substitute the vanilla ice cream with root beer-flavored ice cream for an extra kick.
For a gluten-free option, try almond flour or a gluten-free baking blend. If you’re feeling adventurous, add chocolate chips or crushed nuts to the batter.
Finally, don’t hesitate to experiment with different frosting styles like whipped cream or chocolate ganache! Enjoy your creations!
Additional Tips & Notes
Although I’m excited about how delicious these Root Beer Float Cupcakes turned out, there are a few additional tips that can enhance your baking experience.
First, make sure your butter and eggs are at room temperature for better mixing. When measuring flour, spoon it into the cup and level it off to avoid packing.
If you want a more intense flavor, consider using extra root beer extract. Let the cupcakes cool completely before frosting to prevent melting.
Finally, for an extra fun touch, place the hard candies atop the frosting right before serving to keep them crunchy. Enjoy your baking!